
(How-To) Reset/Recover NSX-T Root Password
We’ve all heard about or been in the position where the only person who knew a critical server password has left the company. Or over time and through various change control, the password documented is no longer working and rebuilding the server from scratch for any reason is never appealing, let alone the core appliance central to your networking and firewall polices.
In this article we are going to walk through how to reset/recover your NSX-T root, admin or audit password. The process is involved, but I assure you the process outlined is straight forward with detailed images to help along the way. Let’s get started.
GRUB MUST BE CONFIGURED TO RECOVER YOUR ROOT PASSWORD
VMware documentation states:
“Important If the configuration (GRUB) is not performed after deploying the appliance and you forget the root password, resetting the root password is not possible”
NSX-T Data Center Installation Guide (pg. 39)
If you have access to the NSX-T appliances with a root login you can enable grub or verify grub is enabled by referring to the (How-To) Configure GRUB – A Password Recovery Insurance Policy article.
Before we start walking through the steps, we need to have the Ubuntu 16.04 Server iso downloaded and placed on a datastore accessible to the ESXi host where the NSX-T manager resides. The iso can be downloaded here.
Note: Pre-staging the Ubuntu image is important because after you complete step #9, you MUST complete the remaining steps in less than 15 minutes to prevent the password from reverting back.
1. First, we will need to power our NSX-T manager down.
2. Power the NSX-T manager up and quickly open a console screen and press the SHIFT key to stop the boot sequence and enter the GRUB loader.
3. Select the ‘Advanced options for Ubuntu‘ and press Enter.

4. You will be presented with a login prompt. This prompt is used to login using the predefined GRUB credentials.
Here are the predefined GRUB credentials:
Enter username: root
Enter password: VMware1
5. On the next screen, highlight the ‘Ubuntu, with Linux‘ option without (upstart) at the end and press the e key to edit.

6. Now that we have the editor open, we need to scroll to the bottom of the text box and locate the line with the word ‘linux‘. Follow that line to the end where you see root=UUID=<UUID>. Delete everything on that line after the root=UUID=<UUID>.
                    if [ x$feature_platform_search_hint = xy ]; then
                      search --no-floppy --fs-uuid --set=root --hint-bios=hd\
0,msdos2 --hint-efi=hd0,msdos2 --hint-baremetal=ahci0,msdos2 4b76f7c8-7\
84c-4741-950e-c8d2dca486c5
                    else
                      search --no-floppy --fs-uuid --set=root 4b76fc8-784c-\
4741-950e-c8d2dca486c5
                     fi
                     echo         'Loading Linux 4.14.74-nn3-server ...'
                     linux         /vmlinuz-4.14.74-nn3-server root=UUID=4b76f\
7c8-784c-4741-950e-c8d2dca486c5 ro audit=1 quiet splash rootdelay=90 net\
.ifnames=0 biosdevname=0 $vt_handoff
                     echo         'Loading initial ramdisk ...'
                     initrd          /initrd.img-4.14.74-nn3-server
In this example we will be partially deleting line 11 and all of line 12 as shown here in red:

7. Now, we need to replace the text we deleted with our own to so we can load our bash shell to reset the NSX-T password.
We need to append after the root=UUID=<UUID> with the following:
rw single init=/bin/bashThe text box should now look similar to this with the addition in the red box:

                    if [ x$feature_platform_search_hint = xy ]; then
                      search --no-floppy --fs-uuid --set=root --hint-bios=hd\
0,msdos2 --hint-efi=hd0,msdos2 --hint-baremetal=ahci0,msdos2 4b76f7c8-7\
84c-4741-950e-c8d2dca486c5
                    else
                      search --no-floppy --fs-uuid --set=root 4b76fc8-784c-\
4741-950e-c8d2dca486c5
                     fi
                     echo         'Loading Linux 4.14.74-nn3-server ...'
                     linux         /vmlinuz-4.14.74-nn3-server root=UUID=4b76f\
7c8-784c-4741-950e-c8d2dca486c5 rw single init=/bin/bash
                     echo         'Loading initial ramdisk ...'
                     initrd          /initrd.img-4.14.74-nn3-server
8. After making the change press ‘Ctrl-x‘ or the ‘F10‘ key to save our changes and reboot the manager into single user mode.
Once the NSX-T manager reboots, it will boot into single user mode. If your console session disconnects, simply open a new console window.
Your screen will look something like this. You may have to press the Enter key to get the shell prompt.

**After Step #9, You Will Have 15 Minutes to Complete the Remaining Steps**
9. If you are resetting the password for the ‘root’ account, run the following command:
passwdIf you are resetting the password for the ‘admin’ or ‘audit’ accounts, run the following command:
passwd <admin or audit user>**Note: You can run the passwd command multiple times**
After running the passwd command above, you will be prompted to enter a password, press enter and then enter the same password again. Press enter again to complete the password change.
10. After you have changed the password on the accounts you want, we will then synchronize the passwords by running:
sync11. Once complete, shut the NSX-T manager down for the final phase of the password reset process.

12. Next, we need to download ubuntu-16.04.6-server-amd64.iso. If you have not already done so at the beginning of this article, you can download it here.
13. After the Ubuntu iso is on your desktop, we need to place the iso onto a datastore accessible to the ESXi host where the NSX-T manager virtual machine resides and attach the iso to the NSX manager virtual machine. To do this, we need to login to the vCenter server or ESXi web UI and import/upload the Ubuntu iso file onto the datastore.
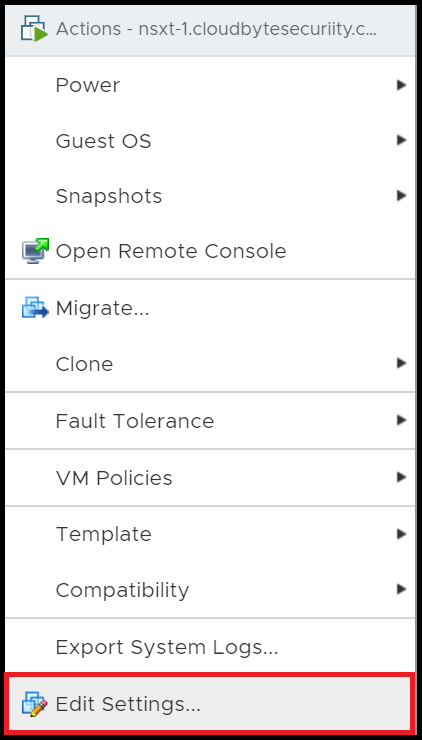
Once the Ubuntu server iso has been uploaded to a datastore, we need to attach the iso to the NSX Manager virtual machine by right clicking on the NSX-T manager virtual machine and clicking ‘Edit Settings’. If needed, add a CD ROM drive if one does not already exist.
In the CD ROM Drive configuration, check the Connect at power on checkbox.
In CD/DVD Media, select Browse then select the Ubuntu image from the applicable datastore.

14. Next, we need to change the boot order from within the BIOS of the NSX manager virtual machine so the CD-ROM drive is used before the primary hard disk. To do this, we need to force the NSX manager to boot to its BIOS so we can make the change.
Click on the ‘VM Options‘ tab at the top of the ‘Edit Settings‘ page.
Select the radio button to ‘Force BIOS setup‘ on the next boot. Then click, OK.

15. Now we can boot the NSX-T manager into its BIOS so we can make the necessary boot order changes.
Power on the NSX-T manager and open a console. Once the BIOS page loads, navigate to the ‘Boot‘ tab and move the ‘CD-ROM Drive‘ to the top of the list.
Then move to the ‘Exit‘ tab and highlight ‘Exit Saving Changes‘ and press Enter.
The NSX-T manager will now reboot into the Ubuntu Server CD we mounted earlier.


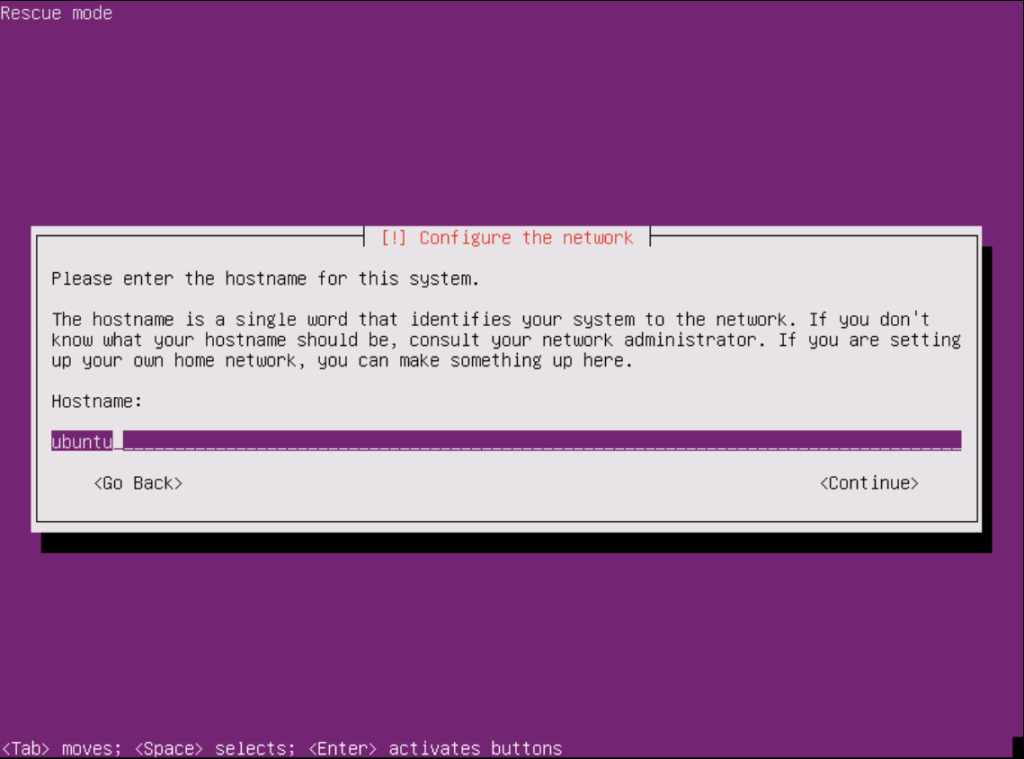
16. Once the NSX-T manager reboots, you will navigate through the Ubuntu setup pages.
- Select Your Preferred Language
- Select ‘Rescue a broken system‘
- Select Your Preferred Language (again)
- Select Your Location
- Select Your Keyboard Configuration
- Select ‘Do not configure the network at this time‘
- Leave Host Name as ‘ubuntu‘ (not used for recovery)
- Select Your Timezone
- Select ‘Do not use a root file system‘
- Select ‘Execute a shell in the installer environment‘
- Select ‘<Continue>‘ to Execute a Shell


17. After you press the Enter key on <Continue>, a shell prompt will appear on the next screen. Here you will run the following commands to ensure the password change(s) made in the previous steps do not revert and are permanent.
The following command will mount the /dev/sda2 partition of the NSX-T manager to the /mnt directory.
mount /dev/sda2 /mntNext, we need to mount the /dev directory. However, we need to use the bind mount option instead so we take the existing directory tree of /dev and replicate it under /mnt. The directories and files in the bind mount are the same as the original.
mount --bind /dev /mnt/devNext, we need to change the root directory for our recovery purposes to /mnt. To do this, we will be using the chroot command. The chroot command will allow us to move back into the NSX-T partition from our ‘alternate’ root file system that we just loaded from the rescue CD.
chroot /mnt
Next, move to the section for your version of NSX-T. It is divided up into two sections, 2.4.x and 2.5.x.
Steps for NSX-T 2.4.x Versions
Now, we need to mount the /config directory and touch the ‘reset_cluster_credentials’ file to update its timestamp. Then we will un-mount the /config directory when done.
mount /config
touch /config/vmware/nsx-node-api/reset_cluster_credentials
umount /config
Steps for NSX-T 2.5.x Versions
touch /var/vmware/nsx/reset_cluster_credentials
Steps for NSX-T 3.x Versions
Now that we have completed making our password changes permanent, we need to exit our chroot instance and clean up.
exit
umount /mnt/dev
umount /mnt
sync
exit
Once we have performed all the above steps and exited the shell, we can reboot the system by selecting ‘Reboot the system’.


Nicely explained!!
LikeLike
great post – thanks a ton
LikeLike
Thanks Steve
LikeLike
Excellent procedure Steve.
Thanks for the explanation and for sharing it.
LikeLike