
(How-To) Install Your First NSX-T Manager Node
We are going to walk through how to install your first NSX-T node with the NSX-T manager .OVA, available for download here.
Login to the vCenter server instance where you want to deploy your first NSX-T manager node.
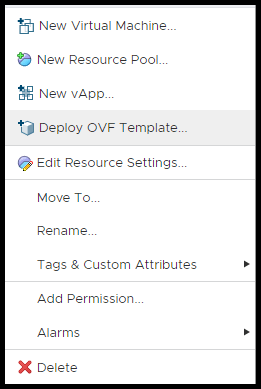
Navigate to Home > Hosts and Clusters
Right click on the resource where you want to deploy the NSX-T manager node and select Deploy OVF Template
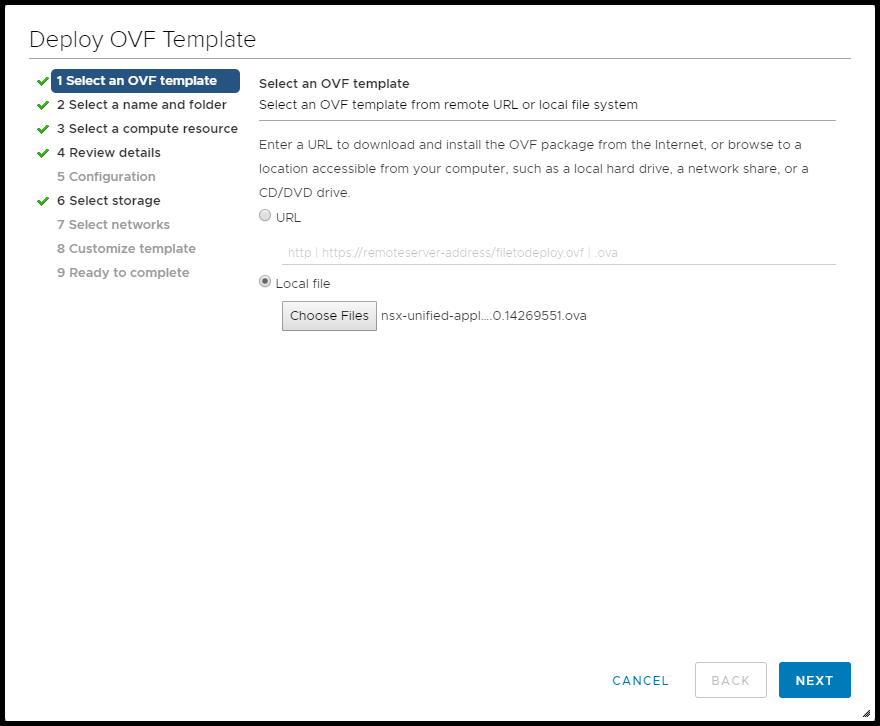
Next, we will fill out the OVF Template wizard.
Select either URL or Local File then click, NEXT.
Next, provide a name for the virtual machine. This is the name that will appear within the vCenter inventory. Click NEXT when finished.

Next, complete steps three and four within the OVF wizard by selecting your compute resource and review your selections.
On the configuration page, select the size of the NSX manager; Small, Medium or Large.
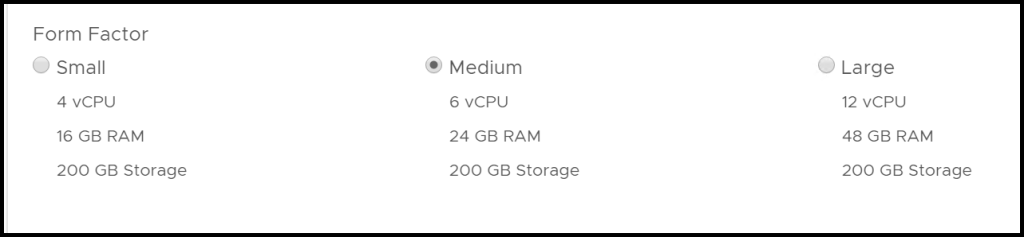
**Note: the ExtraSmall deployment size is only supported for the nsx-cloud-service-manager role**
The deployment size selected should meet all your needs today and into the near to mid future to ensure snappy performance.
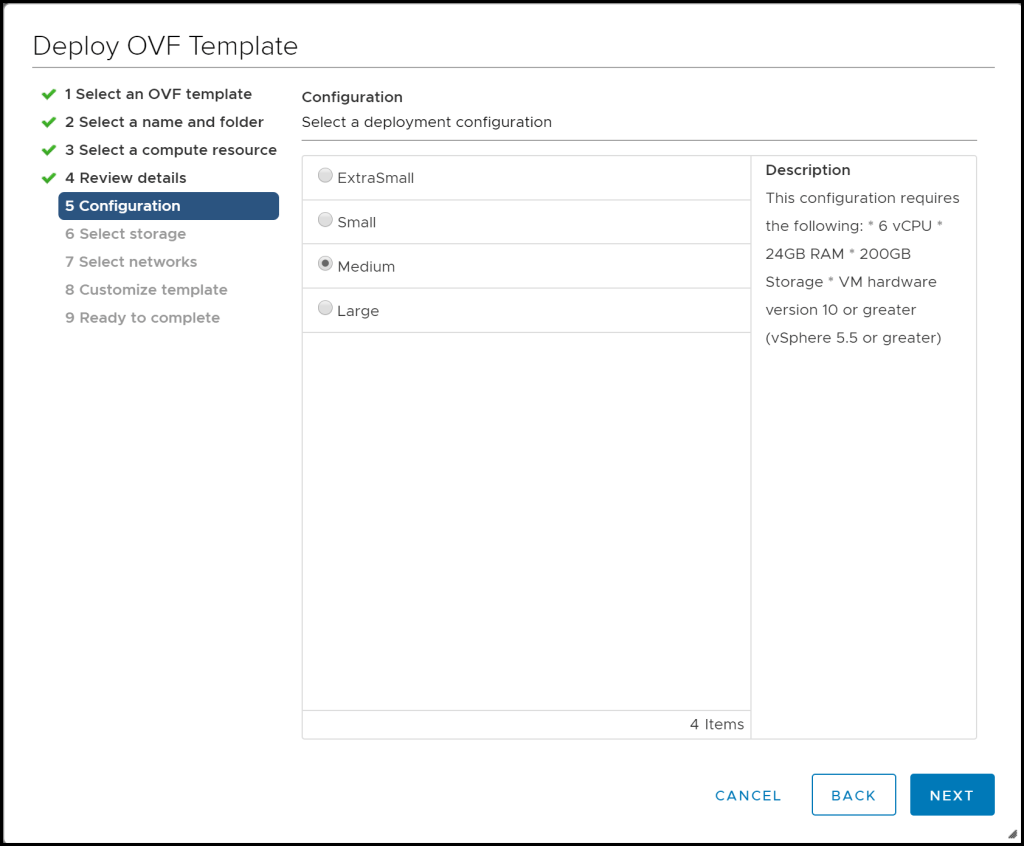
Once you have selected the manager deployment size, click NEXT.
On the storage page, select the datastore where you want the NSX manager node to be deployed. Click NEXT.
On the networks page, select the DVport group or switch you want to connect the NSX manager vNic. When finished, click NEXT.

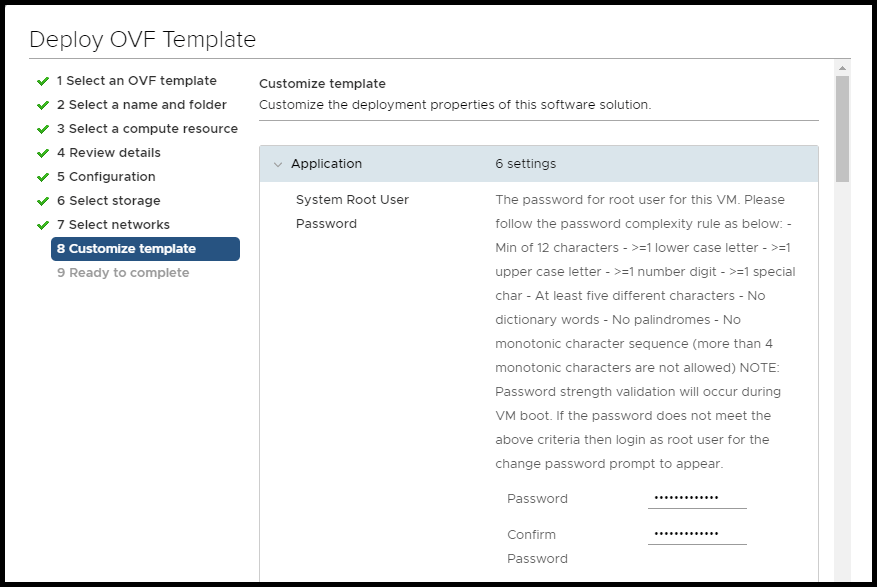
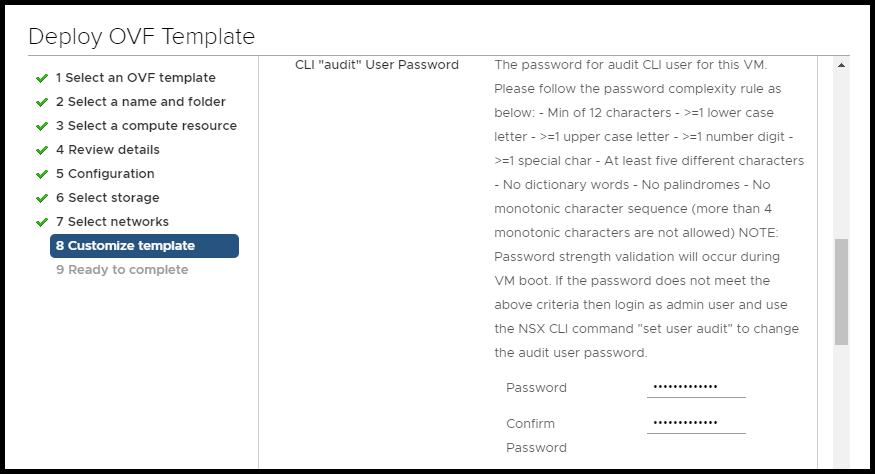
On the customize template page we will configure the bulk of the deployment details. First, we need to create a password for the root, admin and audit accounts.
Make sure the passwords you select meet VMware’s and your company’s password complexity requirements.
VMware password complexity requirements:
- At least 12 characters
- At least one lower-case letter
- At least one upper-case letter
- At least one digit
- At least one special character
- At least five different characters
- No dictionary words
- No palindromes
- More than four monotonic character sequence is not allowed
**Note: passwords by default expire after 90 days**
We will be covering how to change the password expiration time in later steps.

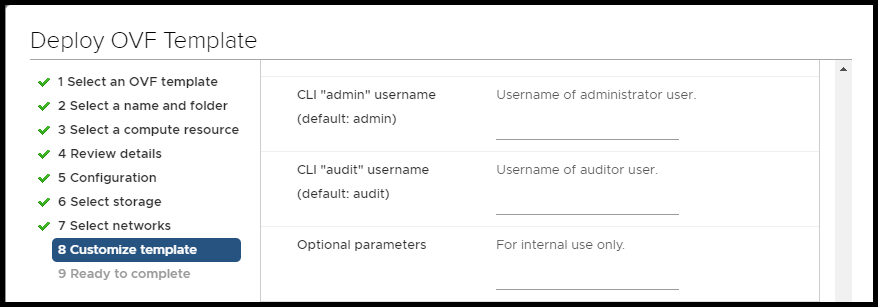
Below, you will have the option to change the default user account names of ‘admin’ and ‘audit’. If you leave these lines blank, the default user names of ‘admin’ and ‘audit’ will be used.
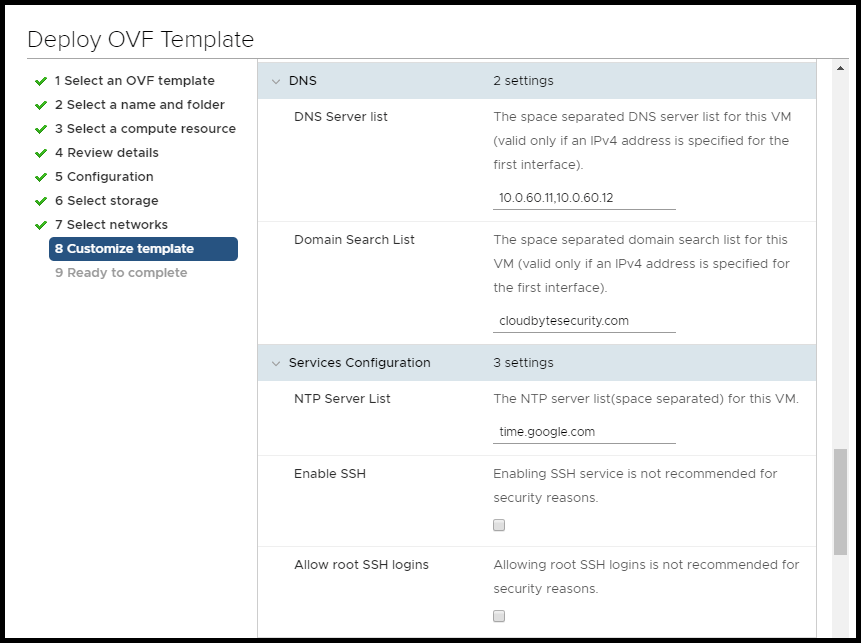
In the next section we will fill out the network properties for this NSX manager deployment. When finished, click NEXT.

On the last page of the OVF deployment wizard, confirm your selections and if everything is correct, click FINISH.
Once the deployment is complete, you will need to manually power on the newly created NSX manager. Be patient to allow the manager to fully boot. The amount of time necessary will be largely dependent on your environment, but the boot should take between 10 to 15 minutes to allow all the necessary services to move into a running state.
Now that the NSX manager appliance has been given time to boot we can confirm all the necessary services are in a running state.
Login to the NSX manager CLI via console or SSH with the admin account and run the following command to see what services are running.
get servicesThe following services are not in a running state by default and are not necessary to be running for the manager to function correctly.
- Liagent
- Migration-coordinator
- Snmp
Services Output:
nsxt-1> get services
Service name:                  cluster_manager
Service state:                 running

Service name:                  cm-inventory
Service state:                 running

Service name:                  controller
Service state:                 running
Listen address:

Service name:                  datastore
Service state:                 running

Service name:                  http
Service state:                 running
Session timeout:               1800
Connection timeout:            30
Redirect host:                 (not configured)
Client API rate limit:         100 requests/sec
Client API concurrency limit:  40
Global API concurrency limit:  199

Service name:                  install-upgrade
Service state:                 running
Enabled on:                    10.0.60.45

Service name:                  liagent
Service state:                 stopped

Service name:                  manager
Service state:                 running
Logging level:                 info

Service name:                  mgmt-plane-bus
Service state:                 running

Service name:                  migration-coordinator
Service state:                 stopped

Service name:                  node-mgmt
Service state:                 running

Service name:                  node-stats
Service state:                 running

Service name:                  nsx-message-bus
Service state:                 running

Service name:                  nsx-upgrade-agent
Service state:                 running

Service name:                  ntp
Service state:                 running

Service name:                  policy
Service state:                 running
Logging level:                 info

Service name:                  search
Service state:                 running

Service name:                  snmp
Service state:                 stopped
Start on boot:                 False

Service name:                  ssh
Service state:                 running
Start on boot:                 True

Service name:                  syslog
Service state:                 running

Service name:                  telemetry
Service state:                 running

Service name:                  ui-service
Service state:                 running
